In order to send bulk emails from Thunder Mailer, you will require an SMTP server. SMTP which is short for Simple Mail Transfer Protocol, is a communication protocol for transferring emails through the Internet. Examples of SMTP servers include free email service providers like Gmail and premium SMTP relay services like SendGrid.
Why Do We Need SMTP Servers?
This is a common question and a fair one too. Considering the fact that we can send emails via mail service providers like Gmail and Yahoo Mail, why do we even need SMTP servers. Well, mail servers, especially popular ones, have billions of emails zipping through their servers every day. So, if you try to run your email marketing campaigns using these public mail servers, you are likely to encounter problems like the following:
- Emails not delivered to recipients
- Emails delivered but end up in spam folders
- Emails lost in Internet space
- Or worst, your account may get blocked
This is where SMTP servers come in handy. SMTP servers allow you to send a higher number of emails from your network or mass email marketing software like Thunder Mailer. Thus, good SMTP servers such as SendGrid can greatly improve your email delivery rate. Emails are also less likely to be labeled as spams.
In this tutorial, we will take a look at how to send a test email via Gmail’s SMTP server.
It is always important to test your emails to ensure that the emails appear like what you want it to especially when you have created it using HTML. Different email service providers works differently and while your email may appear perfect on one email client, it may not appear as such in another. Therefore, we should always test the email. You wouldn’t want a missing call-to-action button, would you?
Why Gmail?
Why should we use Gmail’s SMTP server? What are the benefits and are there any drawbacks? Well, there are plenty of benefits for using Gmail mail server.
- The obvious one is that it’s FREE! Google do not charge you for the use of its SMTP server.
- Setup is really simple and is hassle free with just a few configuration steps here and there. We will explain these steps shortly.
- Sent emails are backed up on Gmail
- Your emails are less likely to be flag as spam
The only drawback with using Gmail is that you are limited to 99 recipients per message. This term is applicable to those who are using Google’s free SMTP service and is in place to fight spam and prevent abuse. You can check Google’s sending limits policy for their latest sending limitations.
If you are planning to go around this by creating a few more messages to get all the emails out to all your recipients, do note that there’s also a limitation of 500 unique external recipients per day.
This means that you will need to distribute your mass email campaign over a few days if your recipients exceed your Gmail quota. However, if you insist on using Gmail and have to send more than the daily limitation, you can opt to create multiple Gmail accounts. However, this may create a headache as you will have so many email accounts to check for replies and to maintain. You can solve this problem by adding a footnote in your email to direct all replies to a separate email address that you do check often. Alternatively, you could use SendGrid server.
How to Send a Test Email Using Gmail
It is really simple and quick to send emails through Gmail’s SMTP server. Before you do the actual sending, you will need to do a test, which will make sure the email will look perfectly on your recipient’s email client. You just need to follow the below steps.
Step 1: Create a Gmail account
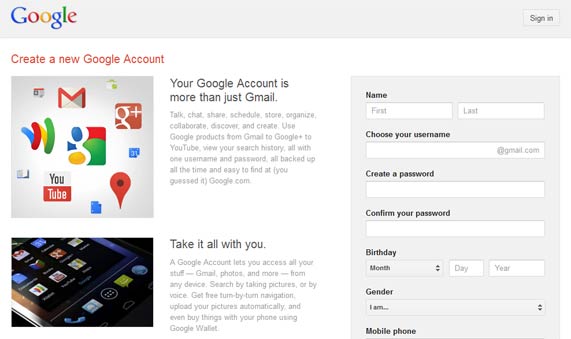
Obviously, you will need a Gmail account. If you don’t already have one, just go over to Gmail to register for a free account.
Step 2: Setting Up Your Profile
Then you will need to setup your sender’s information in Thunder Mailer. This step is a one-time pre-send configuration.
- Go to Settings > Email Properties
- Fill in the necessary fields
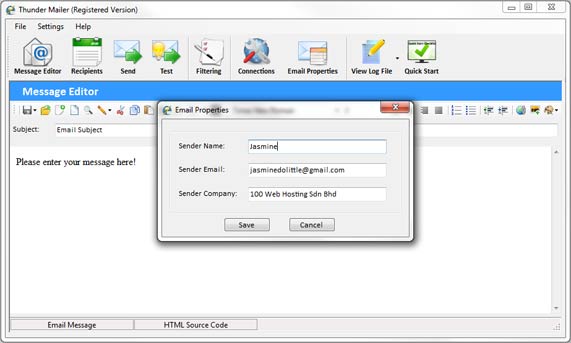
- Sender Name:
Enter the name that you want your recipients to see in the sender column - Sender Email:
Enter the email address you will be using to send emails to your recipients. In this case it’s your Gmail address e.g. example@gmail.com - Sender Company: If you have a company, enter it here. If not, you can either key in your Sender Name again or leave it blank.
- Sender Name:
- Click “Save”.
Step 3: Setting Gmail as the SMTP Server
- Go to Settings > Connection Settings > SMTP Mail Server.
- Click on “Pre-defined”. Here, you will find a list of popular SMTP servers.
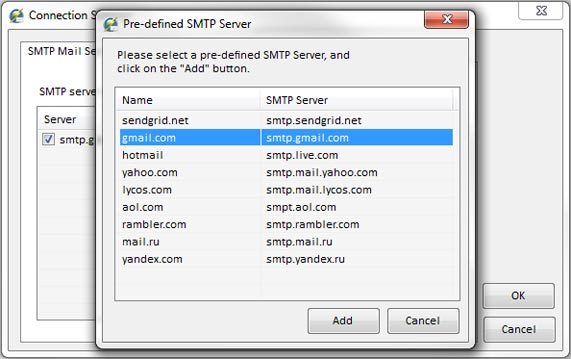
- Select “gmail.com”. You will notice the SMTP Server description says “smtp.gmail.com”.
- Click “Add”. An “SMTP Settings” window will appear.
- Fill up ALL the fields
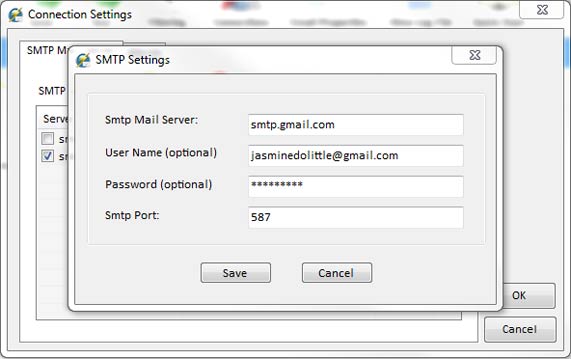
- SMTP Mail Server:
This is for outgoing email server, of which in this case is Gmail’s server address i.e. smtp.gmail.com. You will notice that it has already been filled in. - User Name (optional):
In Gmail’s case, you will need to fill this field in. Enter the user name which you use to login to your Gmail account. - Password (optional):
Again, this is a required field if you choose Gmail. Enter the password you use to login to your Gmail account. - Smtp Port:
This is the port that Gmail assign to users in order for users to relay their outbound mail to Gmail’s mail server. In Thunder Mailer, the port number “587” has been pre-entered as the default port.
- SMTP Mail Server:
- Click “Save”. Make sure your SMTP Mail Server setting is similar to the below screenshot, and the “smtp.gmail.com” checkbox is checked. Click on “OK”.
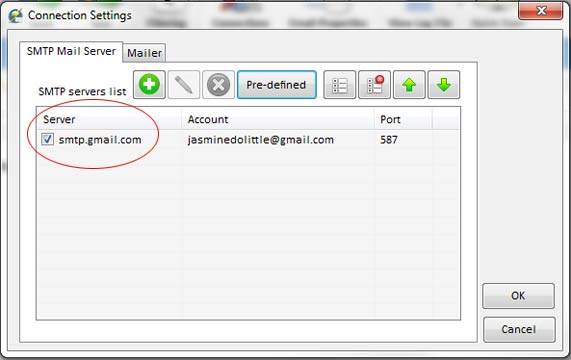
Of course, you can also opt to “Add SMTP Mail Server” manually. This will lead you to step number 5 above. In this case, you will need to add in Gmail’s server address which is smtp.gmail.com
Step 4: Configuring Delivery Options
- Go to Settings > Connection Settings > Mailer.
- Fill in or edit the fields, in the Email Delivery Options.
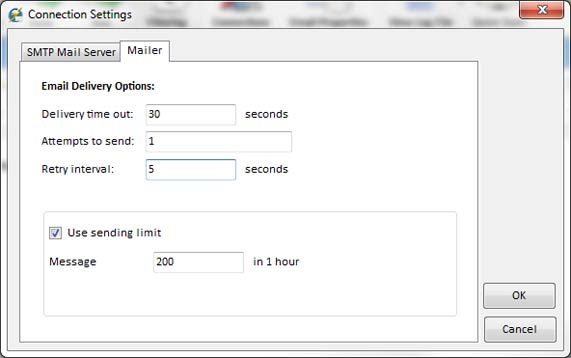
- Delivery Time out:
You can decide the amount of time you want Thunder Mailer to attempt to connect to the SMTP server before ending the connection. A shorter Delivery Time Out will help reduce your resources. - Attempts to send: Determine how many times you want Thunder Mailer to try to send the emails, if it timed out.
- Retry interval: This is how long Thunder Mailer will wait after a failed attempt before trying to re-send.
- Use sending limit: This is used to control the number of emails that will be sent in the given time. In a bid to reduce spam, Gmail for example, may block your emails if they detect a high volume is being sent in a short time.
Spreading your email delivery will also help you to manage your responses e.g. replying emails and answering calls. Recommended to enter 200 messages in 1 hour, if you are using Gmail as the SMTP server.
- Delivery Time out:
- Click “OK” to save the settings.
Step 5: Send a Test Email
Now, you are ready to send your test email. Use the following steps as a guide.
- Click on “Message Editor” on the toolbar.
- Enter your email subject and put in your email content.
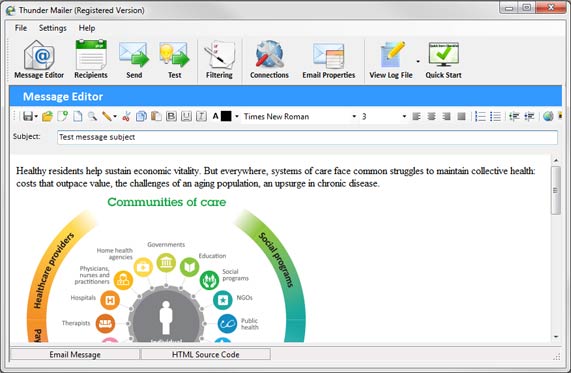
- Once you are done with the email, click on “Test” on the toolbar.
- You will see the “Send Test Message” window. Enter the email address that you want to send the test email to. You can choose to send it to your Gmail account or a different email address.
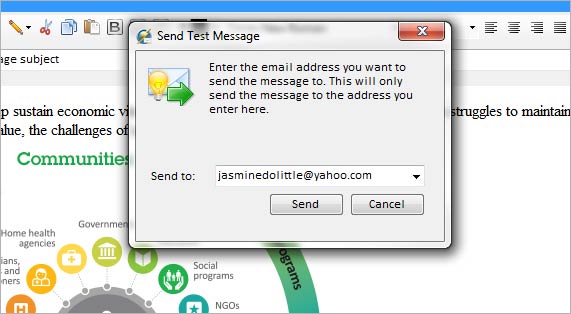
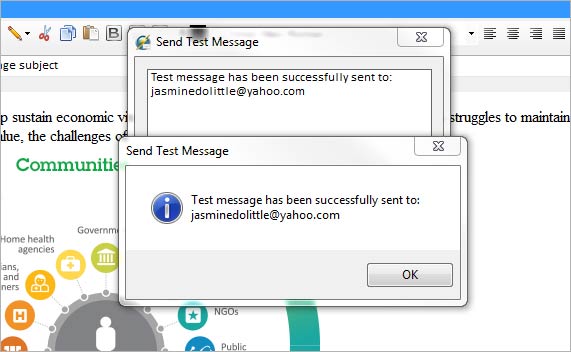
- Click “Send”. In a couple of seconds, you should see a message informing you that your email has been sent.
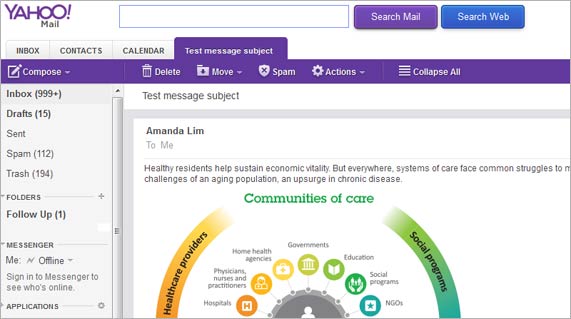
- Login to the test email account and check for the email you have just sent.
That’s it.
You are done with the configuration and testing. If you are happy with how your email looks in your test email account, then you are now ready to proceed with your email campaigns and start sending bulk emails to your recipients. Otherwise, make corrections and test again until you are happy.
How Gmail SMTP Server Works
Here’s briefly on how Gmail SMTP server fits into the picture. When you have composed your email and click on “Test” or “Send”, Thunder Mailer will then connect to Gmail’s SMTP server through the port identified when you create the SMTP settings, which we will discuss soon.
Gmail’s SMTP server will then separate the emails into internal and external recipients. Internal recipients are those with Gmail addresses and will be easily delivered over. External recipients are those with a different domain than Gmail e.g. a Yahoo Mail address. Gmail will then request for the IP address of the other mail service provider and then proceed to transfer the message over to the recipients. Of course, these connections are completed at lightning speed.
Should you have any questions, feel free to contact us.
